
Ben Journée – Gettings Started With Filming Weddings
INTRODUCING BEN JOURNÈE
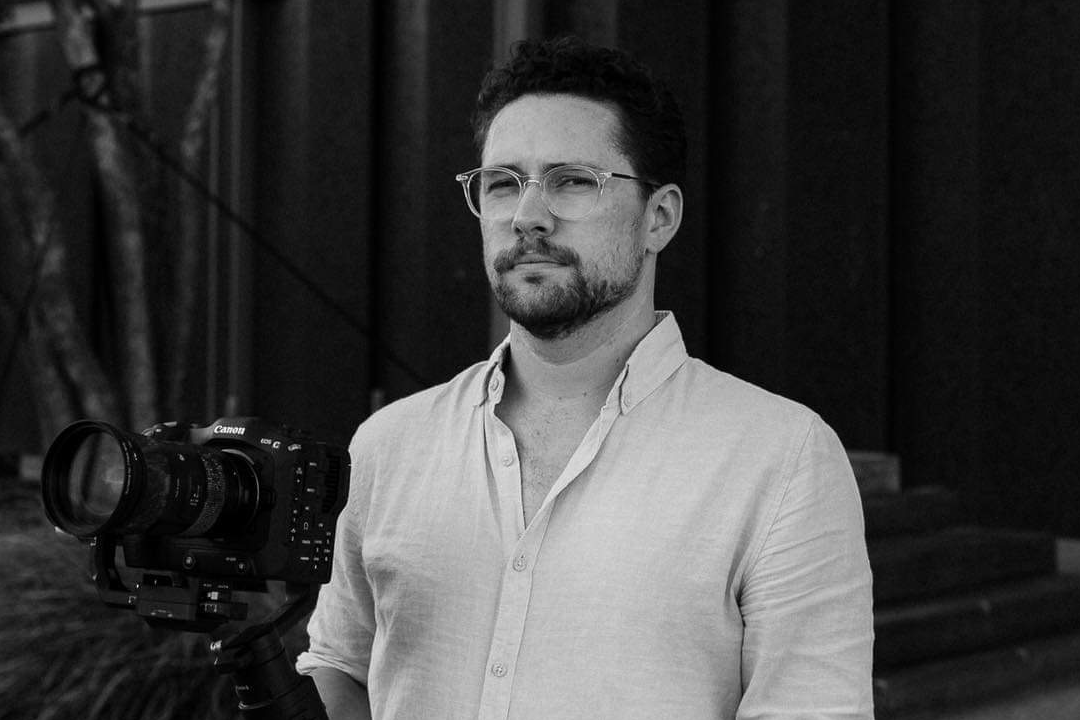
Ben Journée is a wedding filmmaker based in New Zealand. He serves his couples under the brand Side Project Films and also has a podcast called Make Better Wedding Films – “New ideas for radical films about people in love”.
Hi, I am Aida, host of My Wedding Season -The Podcast!
If you prefer listening, this blog post is also available in audio format on my podcast: Episode 38.
MY WEDDING SEASON – THE PODCAST
INTERVIEW MAIN TAKEAWAYS
(I, Aida, have paraphrased what Ben has said in the episode and also added some clarification points.)
Ben Journee has been making wedding films for over 10 years! He came on the podcast to share his knoweldge and give advice to photographers who are looking to add films into their packages. In this episode, Ben breaks down how to get started with filming weddings – he touches on camera settings for video, post-production and creating cinematic films.
The good thing is that photographers already have a step up when it comes to getting into videography. Ben points out that they already understand light, composition and they know how to direct couples. Nevertheless, there are some key differences when it comes to making videos. Therefore, he starts off by explaining the very first steps that need to be taken to get the camera up to speed for making videos.
HOW TO SET YOUR CAMERA UP FOR VIDEO
Step 1: Setting the correct log-format for recording video
Clarification: When you take photos, you have the option of setting it to RAW so that you can have a file containing all the information from the sensor which is unprocessed and uncompressed. If you simply press record on your camera, it will record it linearly -it’s like JPEG. Changing the setting to log helps increase the amount of data being recorded.
Ben explains that it is important to initially set the correct log profile in your camera before filming. For colour, it is important to get it a flat, neutral profile (it will initially looked washed out and grey) – and this allows you to get as much dynamic range as possible. The settings can be done directly in the camera – S-log for Sony and C-log for Canon. You are also able to turn on a “view assist” so that the image that you see on the back of your camera is not so washed out – which is particularly helpful for when you are adjusting your exposure.
Step 2: Recording in 50fps (frames per second)
Ben shares that for super basic video edits, a cheat-code is to have everything in slow motion. It makes everything look nice and smoothens out camera shakes. You can later slow down the 50fps to 50% and it gets played in 25fps (which is industry standard for video – and this is the point at which our eyes see still images as moving).
Step 3: Holding your camera correctly
Ben emphasises that the aim is to get your camera as stable as possible. And the easiest way to do that (regardless of the type of the camera strap that you may have on) is to hold the camera in front of you, with your elbows – that will help you get a stable shot. And it is important to keep in mind that a wider lens gives you less shake (in comparison to zoomed in lenses) when you start to get down to lower shutter speeds.
Ben explains a key difference between photos and videos:
“The thing with video that is different to photos, really, is that photos can live on their own – like a photo can just be a photo. Whereas video is part of an edit – it always exists side-by-side amongst other clips. And so the idea of the variety of angles and variety of framing is sort of amplified with video. You can get real textural with video. Like a shot that would never really be a photo can be mixed in with video just to kind of like add that texture… You just want those little bits of ingredients to paint an overall picture.”
– Ben Journee
POST-PRODUCTION
For editing your films, Ben suggests that you use Final Cut Pro for Mac. and if you are using a PC or have an Adobe Subscription, you can go with Premiere Pro. But it doesn’t really matter which software you end up choosing because they are relatively similiar.
Ben lays out the basics of using an editing software:
Step 1: Laying clips out in a timeline
Ben states that editing softwares allow you to drop in your clips in the order that you want – it is like laying train tracks out from left to right. You need to learn how to get your footage into the software and trim or lengthen your clips, put some music on, colorgrade and export.
Step 2: Culling for video
Ben describes the culling process for footage, because it is different to culling images. Not only do you need to figure out which clips you want to use, but you also need to figure out which parts of the clips you want to use. The terms used for video are in-point and out-point – the middle section of the clip is what you add to your timeline. Once you have all your clips, it is time to change them from 50fps to 25fps – and in order to figure out how to do this in the software that you are using, you can Google / YouTube “time remapping” or “make clips slowmotion in x software”.
Step 3: Finding music
Ben recommends that you go on to websites like Musicbed.com, where you can legally license music for wedding films (side note: I am not sponsored by Musicbed, but Ben’s podcast is sponsored by Musicbed). You can search for different types of music that would fit the vibe that you are looking for. Once you have downloaded your song(s), you can just drag it into your editing software. The music will sit below the video clips on the timeline. You are starting to layer things on top of each other. Ben explains that you should edit to the music – cut the clips to the beat. He states that it makes for a much more enjoyable watching experience and look more professional.
Step 4: Color grading
As mentioned earlier, since you recorded the footage in log form, the footage looks washed out and gray. Ben clarifies that in order to transform it into a nice looking image, you need to use LUTs. There are two stages for taking the washed out image and then adding LUTs to it. First, get it out of a log image and convert it into a Rec 709 LUT – in order to do this, go to the website of the camera brand you are using and download a file to transform it into the right format. Afterwards, you can add on a creative LUT (like the ones you can find on Ben’s website). You can then add it to the layer in the editing software (keep in mind that the order that you do things is important – just like in Photoshop).
The adjustment layer sits on top of everything. Ben explains that this is where you add your transform LUT and creative LUT. Afterwards, you still need to make adjustments by using the colour correction features within the software (similar to Lightroom).
It is also important to pay attention to your white balance settings when filming. During the day, Ben usually just uses 5600K and then in the evening when the artificial lights get turned on, he pays more attention to it.
Bonus: Sound Design
Ben says that sound design is an extra tool to add depth to your footage. You are able to download sound design packs (e.g. by Multiply Media – previous guests on Ben’s podcast). You can get packs full of, for example, seagul noises, wind and waves etc… Ben gives a perfect example: if you have a drone shot of the venue, layering on some bird sounds and wind sounds will elevate it. And this would be placed below the music track on the timeline.
CREATING A CINEMATIC FILM
According to Ben, in order to create a cinematic highlight film – you need to work in the words, the music, and the visuals – they work all together to tell the story. He also refers to it as a story-based film.
Gear needed to capture the ceremony and speeches
In Ben’s opinion, you probably need three cameras recording at one time during the ceremony. For example, during the vows, you want to have footage of whoever is speaking and whoever is being spoken to as well as a third angle. You can have two of the cameras set-up on tripods and the other one on a monopod.
Side note: It is important to know the 180 degree rule for video. This is particulary important during the vows so that the couple speaking to each other is looking to the “right” side of the screen.
Check out this YouTube video for a detailed explanation: Quick Tips: Understanding the 180 Degree Rule!
Ben gives advice on the type of gear to buy:
He says that an entry-level recording device would be a Rode Wireless Go II – it is basically a wireless transmitter with two microphones (e.g. one for the groom and the other one on the celebrant), that goes to a wireless receiver that you plug into the camera.
In additon, you can have a Zoom F3 Recorder that will let you to take a feed from the back of a PA system or a DJ board (it allows you to record whatever the guests are hearing over the speakers). You can also attach a separate recorded to the handheld microphone. He emphasises how important it is to have back-ups!
Ben adds that for speeches, since you cannot use a flash like with photography, you can use LED lights.
Getting Organised
Ben stresses the need to be very organised since you will have a whole lot of footage and audio recording (aka data). And for this, you need a very clear file structure for the corressponding cameras etc.. This is particularly helpful for editing the ceremony that has been recorded from various angles.
The first step that Ben takes in is editing software is to categorize and label all his footage (and audio as well) – he labels everything with parts of the day using keywords e.g. bride prep, groom prep etc… He then does multi-caming – he creates multi-cam sequences for the ceremony and the speeches (this can be done within the editing softwares).
Ben believes that having structure and having a method to go about editing, not only helps you become more organised and faster, but it also helps you move away from having to be in the mood to edit. In order to run out of “editing juice” as he puts it, Ben highly recommends doing everything in stages.
At this point, Ben begins to play around with the editing. The way that he approaches a story-based film is find the “story beats” – figuring out what parts of vows, what parts of speeches are going to tell the story of the couple. Ben chooses to map out the parts that stand out to him in paperform – just writing it all down. E.g. Bits on how they met will go in the start of the film. This is also the stage to figure out the vibe of the film – which parts of the film can be a little funny, which parts more sweet etc…
The next step for Ben is finding the soundtrack to go with the story. He looks at the emotions and vibes from the different sections and then goes to find suitable music. Once he brings in the selection of music into the editing software, he continues to build the film in audio form first – he elaborates by saying that if the audio form works, it will work in video form. Basically, he says that the focus of working the audio is to craft and trim down the words and making sure they fit to the music. Afterwards, you can layer the video footage on top. For instance, if someone is talking about the couple looking great together, show footage of the couple. In essence, Ben is saying “that you can let the words dictate the footage that you pick”.
Wow! Now that was a whole lot of information! If you want to learn more about wedding filmmaking or branding your business, be sure to book a mentorship session with Ben: 2 Hour Mentoring Session or 1 Hour Film Review.
I am so grateful to Ben for taking the time share so much valuable information with us.
Episode & show notes: EP 38. Ben Journee – Getting Started With Filming Weddings
Connect with Ben:
Podcast: Make Better Wedding Films
Wedding Film Website: Side Project Films
Mentorships: Mentoring Services
Instagram: @makebetterweddingfilms
Aida’s Instagram: @aidaglowik
Unpaid promo for the following products:
Ben’s LUTs: Cinematic LUTs – Volume 1
Multiply Films Sound Effects: Flow SFX Pack
Make Better Wedding Films: When Music + Sound Design Meet ft. Multiply Media